
🍪#5 The Final Step to Secure File Uploads
Managing file size, storage, and permissions to build resilient and secure upload features.

This is the final piece of the puzzle in our journey to secure file uploads. After covering file name sanitization, file type validation, and file content inspection, the focus now shifts to ensuring the upload infrastructure itself is secure through robust resource limit management and strict permissions/access controls.
Why Resource Limits Matter
Even perfectly validated files can become a problem when there are no boundaries. Attackers don’t always need to exploit a vulnerability, sometimes they just need scale:
Oversized files can exhaust resources, such as RAM or CPU, degrading performance and availability. Attackers may repeatedly upload them to overwhelm system resources.
Heavy uploads can consume bandwidth, affecting network performance for legitimate users.
Numerous files can complicate storage management, increasing maintenance needs and making backups and recovery processes slower and more error-prone.
When applications allow users to upload without limits, two key risks emerge:
Denial of Service (DoS): flooding a system with excessive or oversized uploads can exhaust available resources instead of exploiting a weakness.
Cost spikes: on cloud platforms that bill by storage, bandwidth, or processing time, a few malicious users can quickly generate massive expenses.
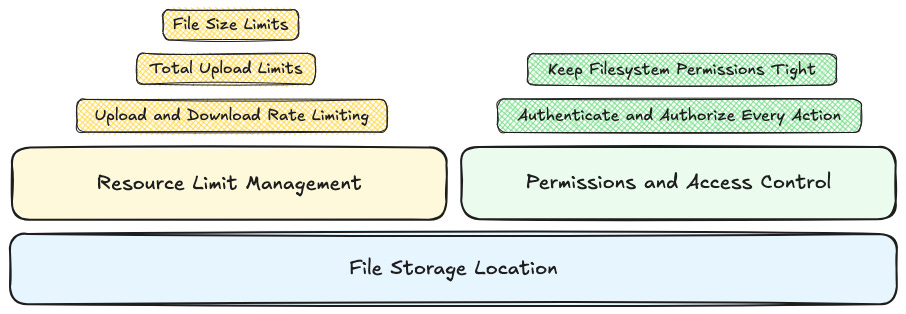
Resource Limit Management
Effective resource limit management requires enforcing technical controls over the size of files, the total number of files a user can upload, and the rate of upload and download requests.
File Size Limits
Every upload endpoint should enforce a maximum file size. Without this control, an oversized file can freeze your app while it tries to process or store it.
A simple way to handle this in Node.js is with multer, which supports size limits natively:
const multer = require(”multer”);

const upload = multer({
  ...
  limits: { fileSize: 5 * 1024 * 1024 } // 5 MB
});
When users exceed this size, the request is automatically rejected, keeping memory and disk usage predictable.
Beyond security, size limits also help protect user experience by preventing long upload times and reducing failures in slow connections.
💡 Tip: Define limits based on your actual business needs.
Total Upload Limits
Restricting the size of a single file is not enough. An attacker could automate uploads of countless small files, eventually filling up your storage and degrading system performance. Even if each upload is small and passes validation, the cumulative effect can overwhelm storage, backups, and indexing processes.
A reliable method is to also monitor the number of uploads or the total storage space consumed by each user. When either threshold is reached, the application should temporarily block new uploads until space is freed or the quota is increased. This approach enforces fair resource usage across users, prevents storage abuse, and helps maintain long-term system reliability.
Upload and Download Rate Limiting
Rate limiting is a necessary measure that imposes restrictions on the number of upload and download requests a user can make within a short period to prevent excessive data transfers. This control helps prevent any single user from flooding the system with numerous requests, which is crucial for mitigating Denial of Service (DoS) attacks.
Here is a simple Express example using the express-rate-limit npm package to control the number of uploads allowed per time window:
const { rateLimit } = require(”express-rate-limit”);

const uploadLimiter = rateLimit({
  windowMs: 15 * 60 * 1000, // 15 minutes window
  max: 100, // Limit each IP to 100 requests per windowMs
  message: “Too many uploads, please wait a bit.”
});

app.post(”/upload”, uploadLimiter, (req, res) => {
  // File upload logic here
});
Whenever authentication is available, base rate limits on the user’s session rather than on IP addresses. Also note that the IP received by the application often belongs to an intermediary element in the infrastructure rather than the actual client.
File Storage Location
Before setting up uploads, it’s important to decide where the files will live. The storage location directly impacts both security and performance.
Using a third-party storage service such as Google Cloud Storage is often the preferred option. These services typically come with robust, industry-standard security features, including encryption (both at rest and in transit), secure APIs, role-based access control (RBAC), automated updates, built-in redundancy, detailed audit logs, and compliance with various regulations like GDPR, HIPAA, or SOC2.
When a third-party service is not an option, consider deploying a dedicated server for file storage, isolated from the main web application. This approach provides complete segregation of duties between the application handling user interactions and upload requests from the server managing file storage, thereby reducing the impact of potential vulnerabilities.
If neither a storage service nor a separate server is possible and files must reside on the same host, make sure they are placed outside the webroot directory to prevent direct web access and reduce exploitation risk.
Permissions and Access Control
Once files are stored, the next question is: who can access them?
Regardless of whether files are kept in cloud object storage or on a self-hosted server, the same principle applies: only authorized users should be able to upload, view, or download them.
Authenticate and Authorize Every Action
When users are permitted to upload files, ensure they can only:
Access their own uploaded content.
Retrieve files via validated application endpoints, not through direct public URLs.
Even when files are stored in a managed service such as Google Cloud Storage, all access should be managed through your web application, where authorisation, validation, and logging can take place.
A common mistake is serving files from a publicly accessible path, for instance:
A local web server directory like
/uploads/.Or an open storage bucket such as
https://storage.googleapis.com/my-bucket/uploads/...
If filenames are predictable, attackers can easily enumerate and retrieve private files.
Instead of exposing direct storage URLs, use an internal handler in your backend to control all file access. This handler acts as a controlled gateway that verifies permissions, logs access, and only then issues a temporary signed URL for the user to download the file.
This design ensures that every download request is authenticated, authorised, and traceable, while the underlying storage such as Google Cloud Storage remains private and isolated from public exposure:
const { Storage } = require(”@google-cloud/storage”);
const storage = new Storage();
const bucket = storage.bucket(”my-secure-bucket”);

app.get(”/download/:id”, authMiddleware, async (req, res) => {
  const file = await db.getFile(req.params.id);

  if (!file || file.ownerId !== req.user.id) {
    res.status(403).json({ message: “Forbidden” });
    return;
  }

  // Generate a signed URL valid for 2 minutes
  const [url] = await bucket.file(file.storedName).getSignedUrl({
    version: “v4”,
    action: “read”,
    expires: Date.now() + 2 * 60 * 1000,
  });

  res.json({ downloadUrl: url });
});
In this pattern, the /download/:id route functions as the internal handler. It performs authentication through middleware, enforces authorisation by verifying file ownership, and generates a short-lived signed URL to provide secure, time-limited access.
This approach keeps files private within the storage service while users access them safely through verifiable and expiring links that do not reveal internal bucket paths or filenames.
💡 Tip: When using signed URLs, keep expiration times short and include user or session identifiers in logs.
Keep Filesystem Permissions Tight
When files are stored on a regular server such as a Linux host or a self-managed instance, permissions become a critical layer of defence. Properly configured filesystem permissions help ensure that uploaded files cannot be executed or accessed by unauthorised users, even if a vulnerability exists elsewhere in the application.
Uploaded files should never be granted execute permissions. In most cases, the application process only needs to read and write files like images, documents, or logs. Executing them should be strictly disallowed.
Additionally, not every file needs both read and write permissions. For instance, if the application only writes files that are later processed or archived, write-only permissions can further reduce the attack surface.
Equally important, ownership of the upload directory should also be limited to the non-privileged user running the application (for example, nodeapp), preventing other system accounts from accessing or modifying those files:
sudo mkdir -p /srv/uploads
sudo chown nodeapp:nodeapp /srv/uploads
sudo chmod 700 /srv/uploads
This configuration ensures that only the application user can read or write to the directory and that no one can execute files within it.
Reading Picks
Here are a few articles I found valuable in recent weeks: